
The following steps will assist you in setting your e-mail account up in EM Client v7:
1. Open EM Client.
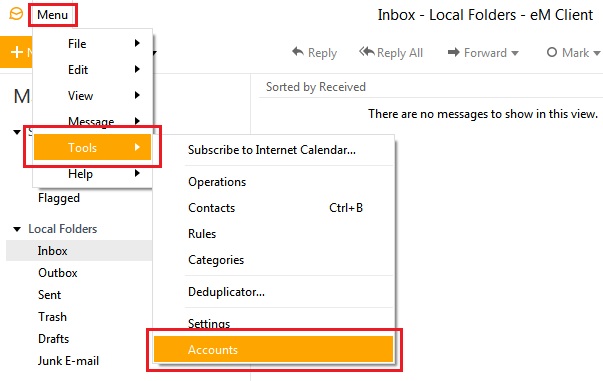
At the top left-hand side, click on Menu. Select Tools and then Accounts.
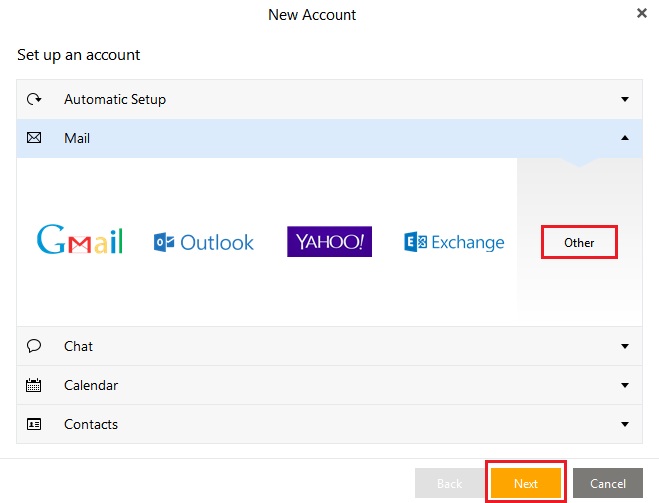
2. In the New Account window, click on Mail.

3. Select Other and then click on Next.
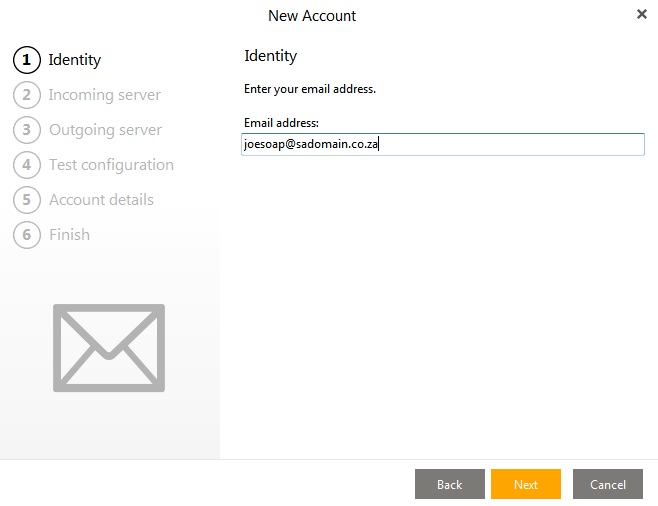
4. Enter your e-mail address and click on Next.
5. On the Incoming server page, select IMAP.
Enter the following information:
- Incoming server: Enter mail.yourdomain (e.g.: mail.sadomain.co.za)
- User name: Enter your entire e-mail address using lowercase characters (e.g.: joesoap@sadomain.co.za).
- Password: Enter the password for your e-mail address.
Click on Next.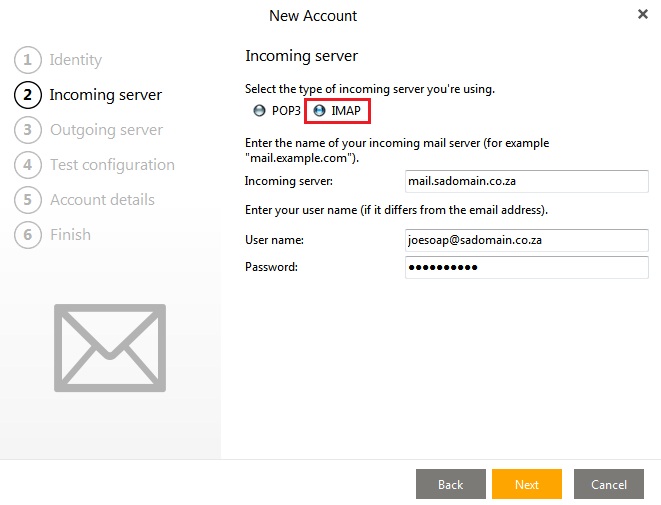
6. On the Incoming server page, enter the following information:
- Outgoing server: Enter mail.yourdomain (e.g.: mail.sadomain.co.za)
- User name: Enter your entire e-mail address using lowercase characters (e.g.: joesoap@sadomain.co.za).
- Password: Enter the password for your e-mail address.
Ensure that the box labelled Outgoing server doesn't require authentication is unticked.
Click on Next.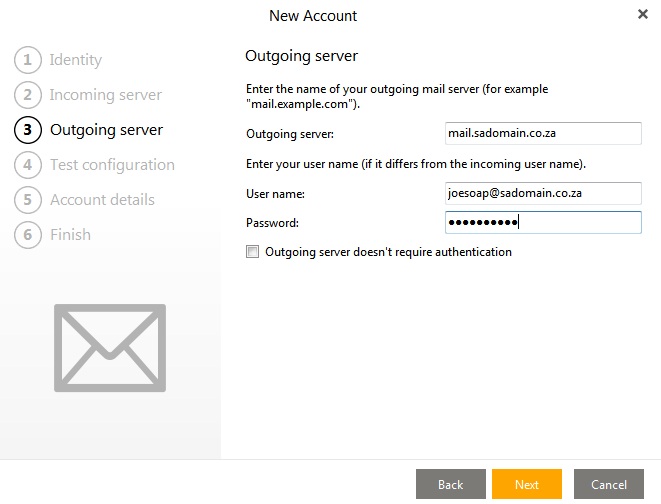
7. EM Client will now test your settings. Once the texts have been completed, click on Next.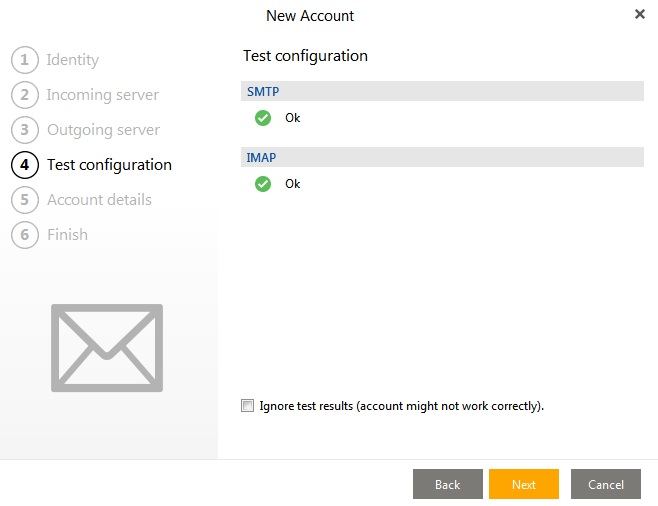
8. On the Account details page, enter the following information:
- Your name: This will be displayed alongside your e-mail address when you send an e-mail.
- Account name: This is a description of your e-mail displayed in EM Client.
Click on Next.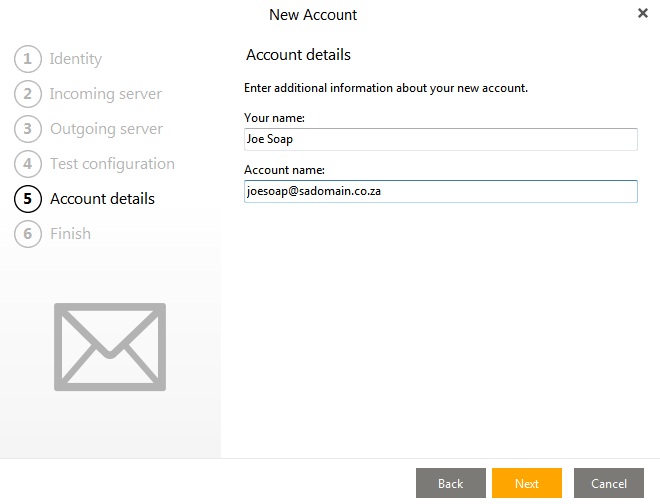
9. Select Create separate folder tree for messages.
Click on Finish.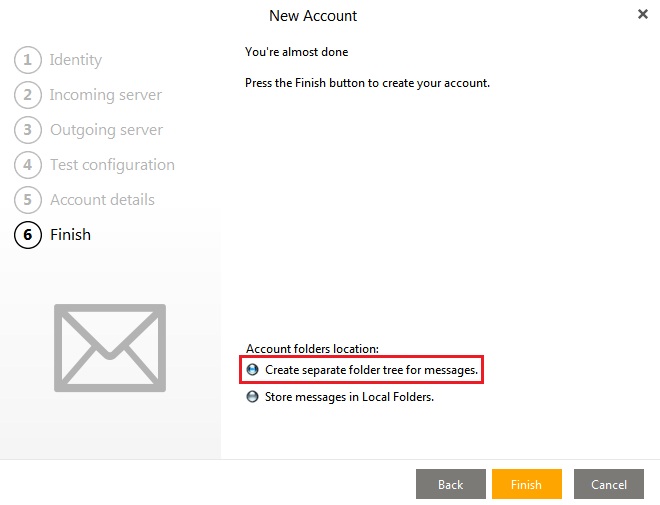
10. Once your account has been set up, you will be taken back to the main EM Client window.
Click on Menu. Select Tools and then Accounts.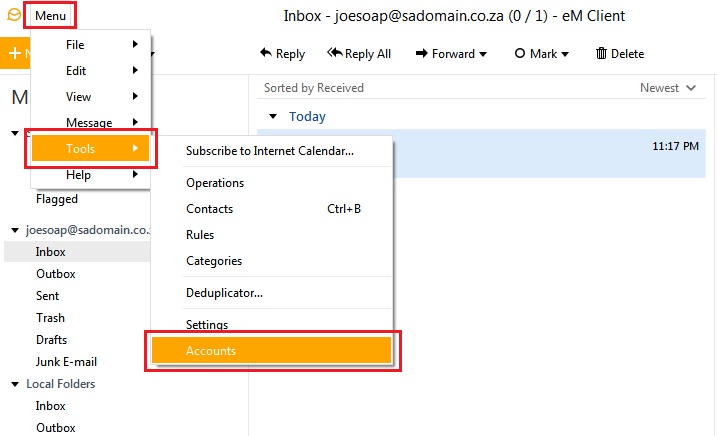
11. When the Accounts window opens, select the SMTP tab.
Change the Port to 587.
Click OK.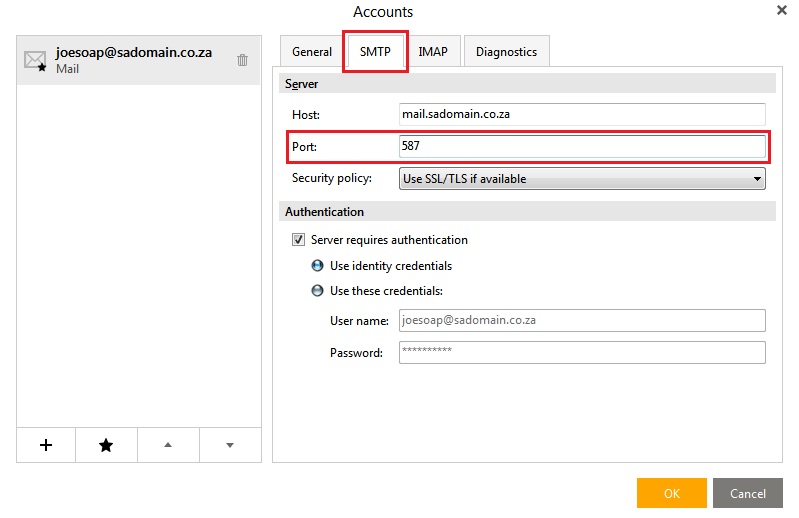
A video tutorial can be viewed below.